Turning your training bike into a Speed remake
(for context, this article was written during the containment period in 2020)
In those days of isolation, finding ways to get a regular physical activity is important, both for health and moral. It turns out that I own a training bike, so it was a good opportunity to take it back from wherever it had been stored for years (yeah, like you kept using it).
I tend to use the bike while watching series to make it less boring. But I noticed that, when getting to the climax of a good episode, one tends to forget about the bike and unconsciously slows down. So I thought of an amusing way to fix that.

Remember the most famous part of the Speed movie? A bus is rigged with a bomb that explodes if it moves slower than 50 mph. What if we stole the concept?
Of course, I do not wish my training bike to explode, mostly for practical reasons. Instead, I would like the video to automatically pause when I get below the threshold, providing an immediate incentive to pedal harder. And so I built just that.
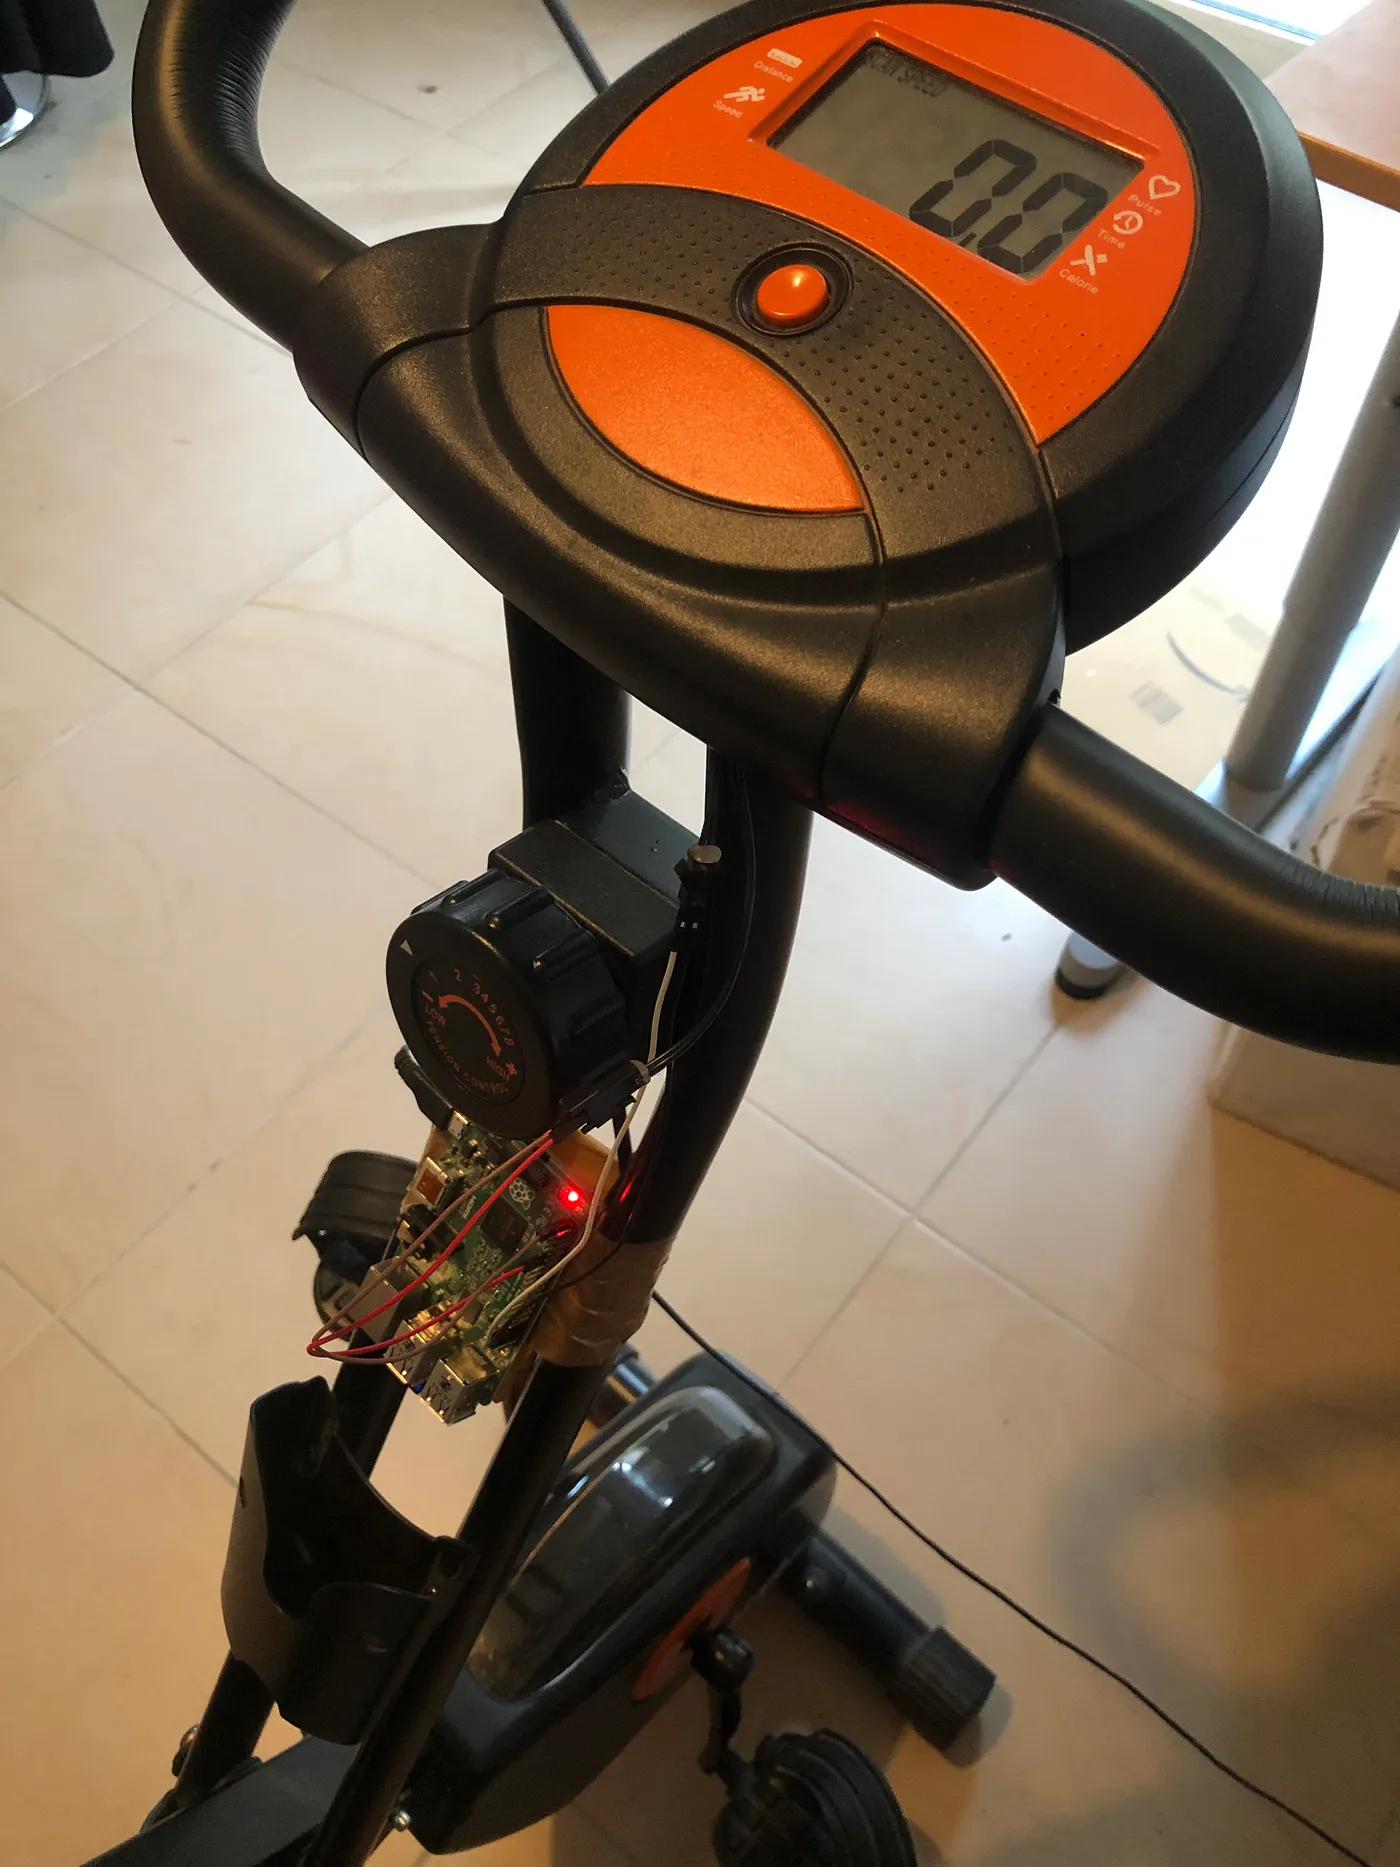
The setup uses a Raspberry Pi to read the speed from the bike and send it to the computer. There, an application takes care of playing/pausing the video as needed.
The very first step was finding how to read the speed. The speed counter of my training bike is connected using a simple 2-pins connector.
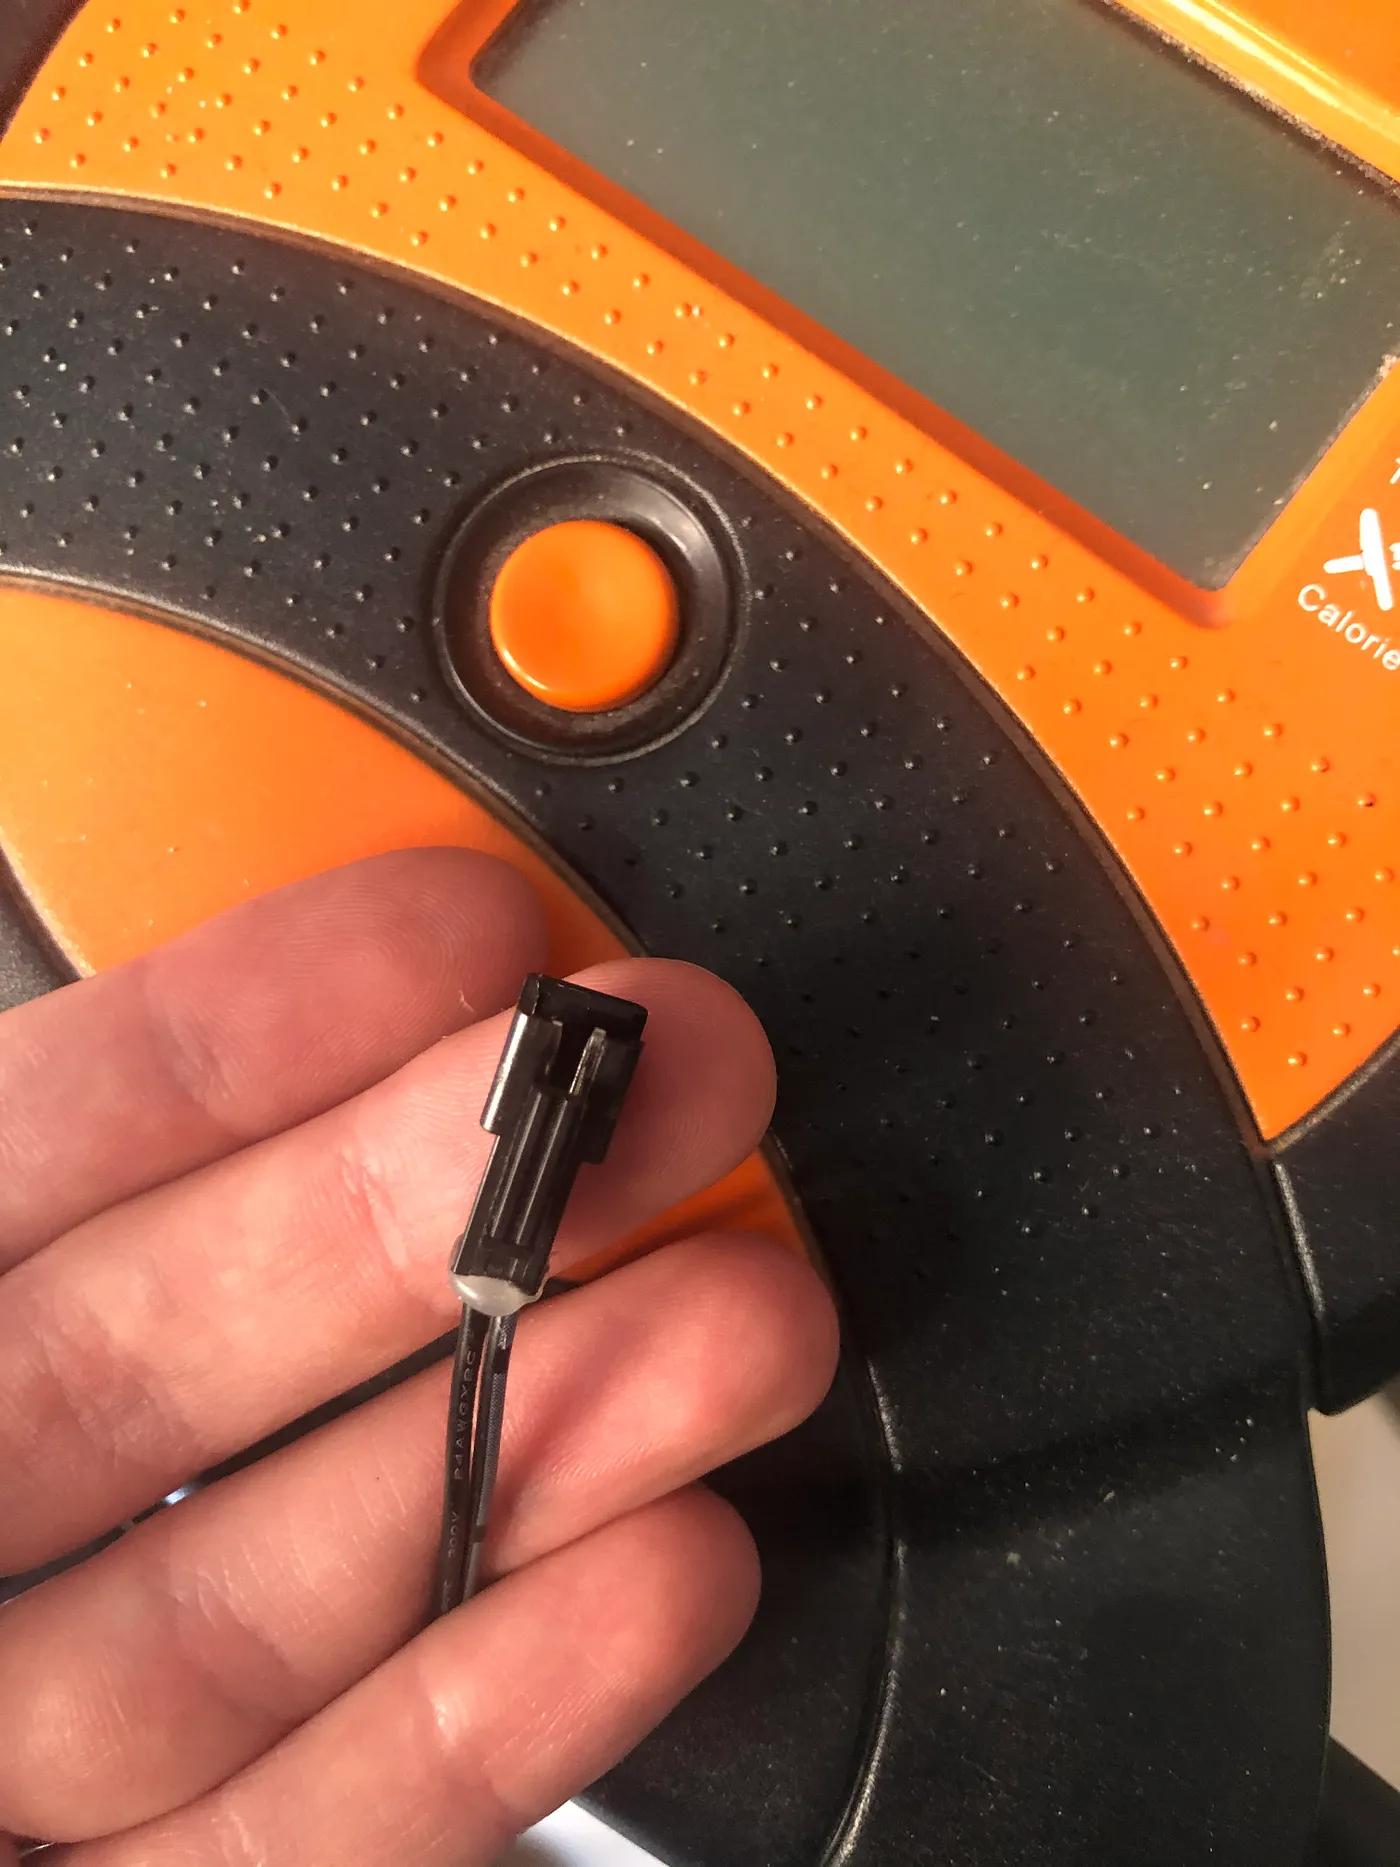
Fortunately, those things are pretty standard, and you can use any breadboard cable to connect the pins. The next question is: where to plug them?
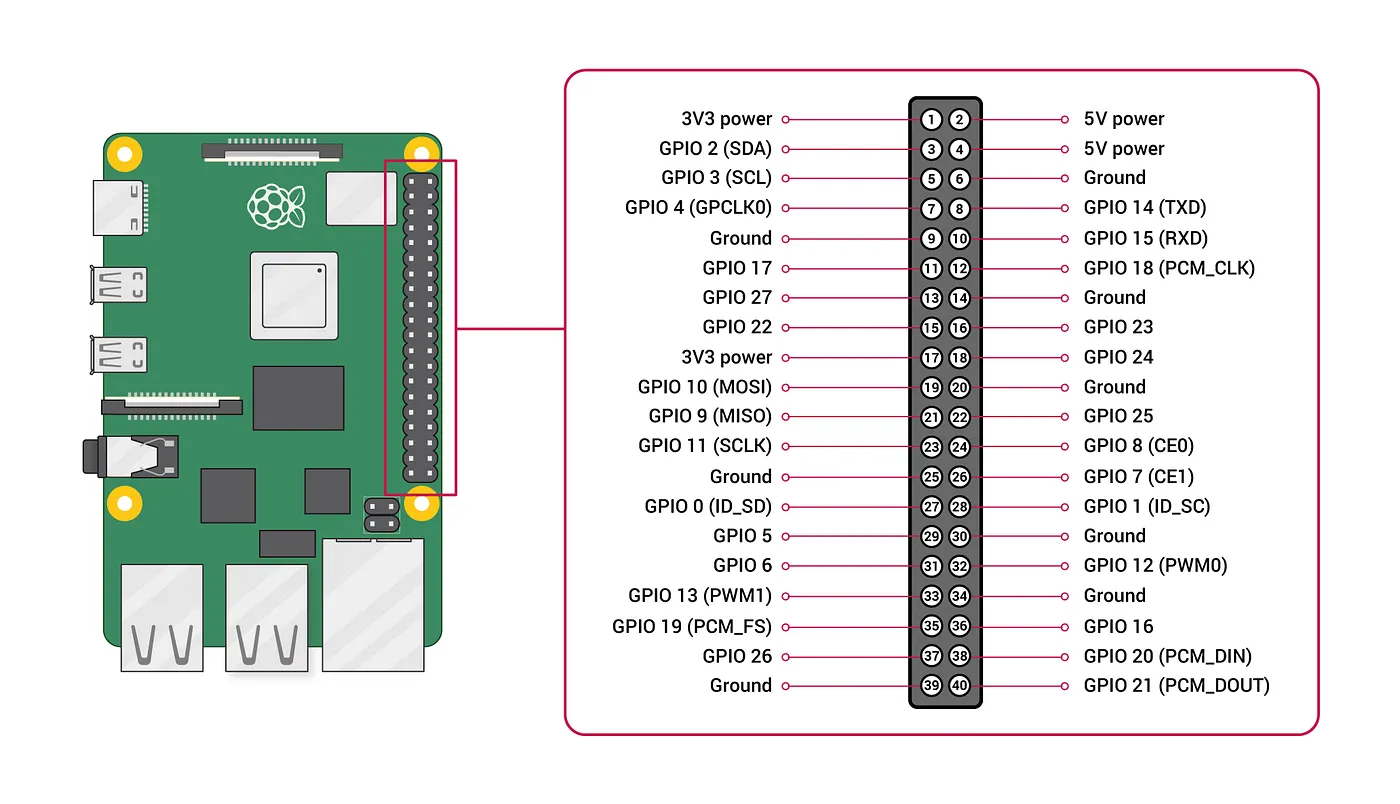
The Raspberry Pi has a set of pins called GPIO (for general-purpose input/output) that you can use for all kinds of things. Not all pins are created equal, so you must make sure to pick the right one depending on what you’re trying to do:
To pick the right pins, we need to clarify what we’re doing. I’ve already seen bike speedometers in the past, and they worked by having a magnet attached to the wheel and a detector attached to the frame. As the wheel is turning, when the magnet gets close to the detector, it triggers a switch that closes the circuit. Then it’s just a matter of counting the time between each of those impulses and deducing the speed (by knowing the size of the wheel).
I assumed that my training bike worked the same way. So I plugged one pin of the bike connector to the 3.3V of the Raspberry (pin 1), and the other to a GPIO pin (pin 7). My expectation was that, as the training bike internal wheel turned, it would close the circuit and I would be able to read the 3.3V impulses on the GPIO pin.
That’s great, but to read those impulses we need some software. I tried playing a little bit with Windows 10 IoT, but it doesn’t support the Raspberry Pi properly and I ended up using Raspbian instead. If like me you don’t feel like plugging a keyboard and a screen to the Raspberry, there are great tutorials out there explaining how to prepare an SD card with a Raspbian that automatically starts an SSH daemon.
For the code itself, I decided to use .NET Core, since it supports reading/writing from GPIO pins using the System.Device.Gpio NuGet package.
To control the pins, you first need to instantiate a GpioController:
var controller = new GpioController(PinNumberingScheme.Board);
You can then open a pin and start listening to any change:
int pin = 11;
controller.OpenPin(pin, PinMode.Input);

controller.RegisterCallbackForPinValueChangedEvent(pin, PinEventTypes.Rising | PinEventTypes.Falling,
  (s, e) => Console.WriteLine(e.ChangeType));
At least, that’s what I thought. But after launching the program, I started receiving a continuous stream of Rising/Falling events even though I wasn’t touching the bike! After a bit of poking around, I noticed two things:
-
The events would be triggered at a very precise rate of 50 per second
-
The events were triggered only when the circuit was open. When I moved the pedals in position to close the circuit, the events would stop
I have only a cursory understanding of this, but from what I read it seems that when setting the pin mode to Input, it’s connected to nothing. Therefore, when the circuit is open and we try to read the value, it picks up residual noise (I suspect the 50 Hz is due to interference caused by the AC input, but don’t quote me on this). Instead, we need to use InputPullDown, which will ground the pin and properly read nothing when the circuit is open. After those changes, the events were properly captured, so the next step was to compute the actual speed.
On a real bike, it would just be a matter of measuring the size of the wheel and deducing how much distance is covered for one rotation. But on a training bike, we don’t have a wheel we can measure, so we must figure out what value the internal counter is using.
One way could be to use the bike, try to pedal at a constant speed, and read the value on the internal counter. Then plug the Raspberry, pedal at the same speed, compute the frequency, and deduce everything we need. This could work but it would be very approximate, as it’s difficult to pedal at a constant speed. Instead, I decided to plug the Raspberry directly to the counter and use it to simulate the bike. This way, we can send impulses at the frequency we want and read the speed on the counter. To plug the Raspberry to the counter, I simply connected one pin of the counter on a GPIO pin, and the other to the ground. Then I wrote some code to send the impulses at the desired frequency by using GpioController.Write:
private static void TestSpeed(GpioController controller)
{
    int pin = 36;
    controller.OpenPin(pin, PinMode.Output);

    int delay = 500;

    Console.WriteLine("Started");

    Task.Run(() =>
    {
        while (true)
        {
            controller.Write(pin, PinValue.High);
            Thread.Sleep(1);
            controller.Write(pin, PinValue.Low);
            Thread.Sleep(delay);
        }
    });

    while (true)
    {
        var rawValue = Console.ReadLine();

        if (int.TryParse(rawValue, out int value))
        {
            delay = value;
            Console.WriteLine($"Delay set to {delay} (frequency: {1000 / delay} hz");
        }
    }
}
At one impulse per second, the counter shows a speed of 16 km/h. Therefore, to compute the speed in km/h in our own setup, we need to compute the frequency in Hz of the impulses and multiply it by 16. Great.
Before moving on, I couldn’t resist having a bit of fun.
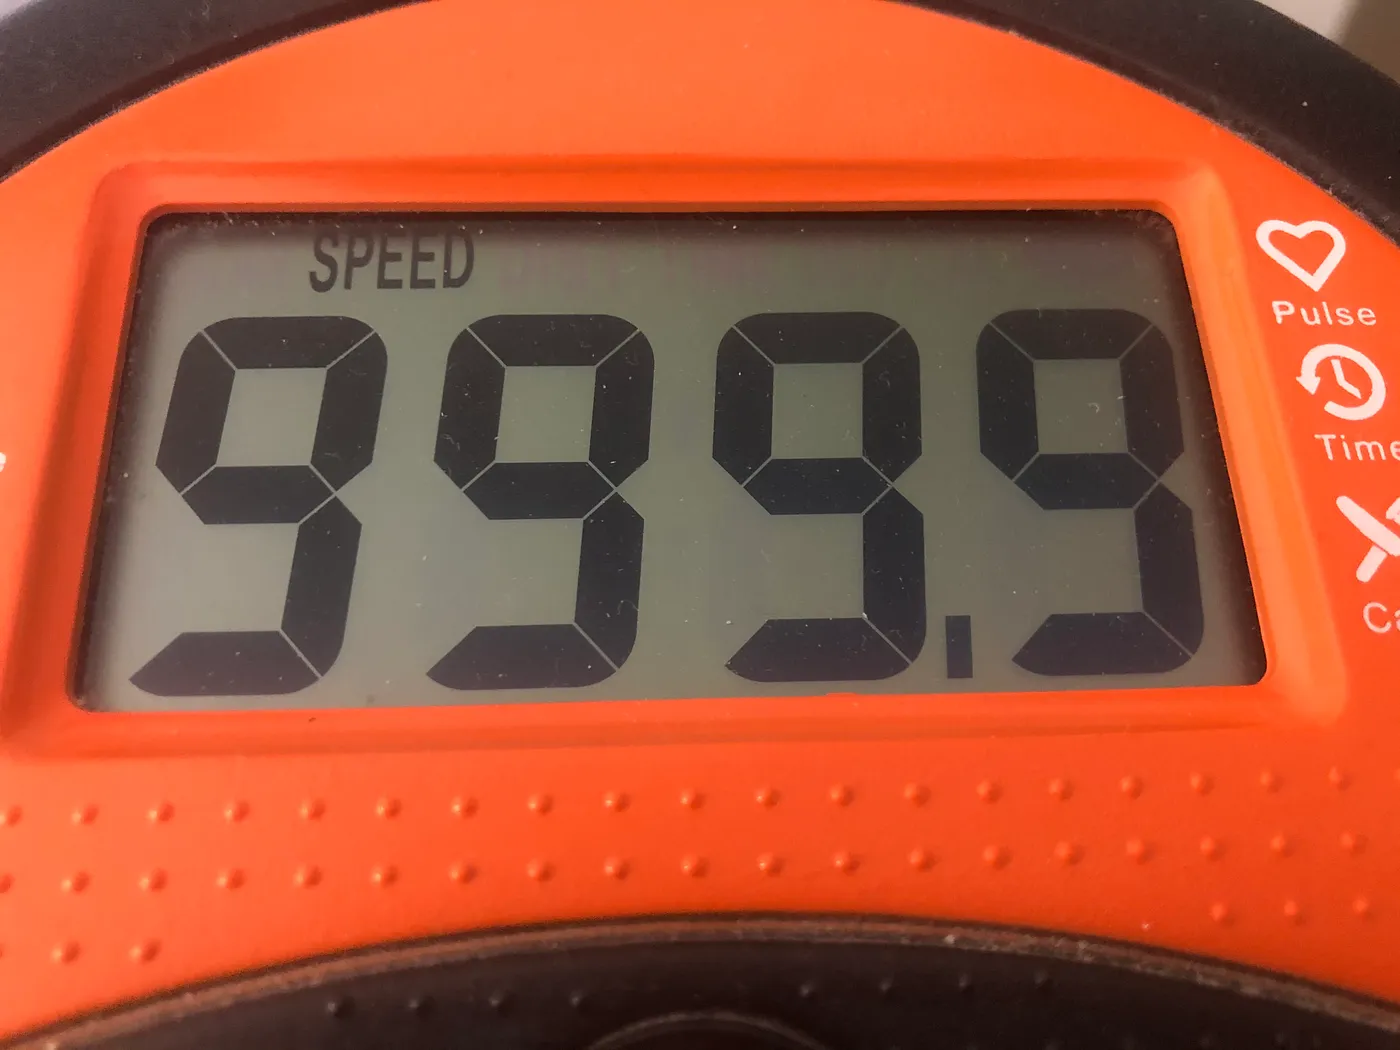 Without breaking a sweat
The maximum value that the counter can display is, as we could expect, 999.9 km/h. If I further increase the frequency, it overflows at around 2000 km/h (maybe 2048, my setup is not precise enough) and counts back from 0.
Ok, moving back to the serious stuff. I decided to keep the Raspberry plugged to both the bike and the counter so that I could capture the current speed and keep displaying it on the counter. The final code to compute the speed looks like:
var controller = new GpioController(PinNumberingScheme.Board);
var sw = new Stopwatch();
int pin = 11;
int outputPin = 36;

controller.OpenPin(outputPin, PinMode.Output);

controller.OpenPin(pin);
controller.SetPinMode(pin, PinMode.InputPullDown);

controller.RegisterCallbackForPinValueChangedEvent(pin, PinEventTypes.Rising | PinEventTypes.Falling,
    (s, e) =>
    {
        if (e.ChangeType == PinEventTypes.Falling)
        {
            _controller.Write(outputPin, PinValue.Low);
        }
        else
        {
            _controller.Write(outputPin, PinValue.High);

            if (!sw.IsRunning)
            {
                sw.Start();
            }
            else
            {
                var elapsed = sw.Elapsed;
                sw.Restart();

                var rotationsPerSecond = 1.0 / elapsed.TotalSeconds;
                double speed = rotationsPerSecond * 16;

                Console.WriteLine($"Speed: {speed} km/h");
            }
        }
    });
The next step was to send that data to the computer. I could simply return the current speed on a web page and poll it from my computer but hey, the year is 2020. To get about one value per second, we totally need some push technology, so I decided to use SignalR.
I actually started by thinking that SignalR was overkill and tried using raw web sockets instead. It seemed to work at first, but I quickly discovered that stuff we take as granted, such as detection of disconnections, isn’t available out of the box. So yeah, use SignalR instead.
For the implementation, I wrote a IHostedService that computes the current speed, and push it to the SignalR hub. It worked fine but I later discovered a problem: since I was waiting for inputs on the GPIO to compute the speed, if I suddenly stopped pedaling then the speed would stop being updated and would remain at its latest value. It kinda defeated the whole purpose of the project. So I added a background thread that monitors the time since the last speed update and assumes a speed of 0 km/h after 3 seconds without any change.
internal class SpeedCounter : IHostedService
{
    private readonly IHubContext<SpeedHub> _hub;
    private readonly GpioController _controller;

    public SpeedCounter(IHubContext<SpeedHub> hub)
    {
        _hub = hub;
        _controller = new GpioController(PinNumberingScheme.Board);
    }

    public Task StartAsync(CancellationToken cancellationToken)
    {
        int pin = 11;
        int outputPin = 36;

        _controller.OpenPin(outputPin, PinMode.Output);

        _controller.OpenPin(pin);
        _controller.SetPinMode(pin, PinMode.InputPullDown);

        var sw = new Stopwatch();

        var lastUpdate = DateTime.UtcNow;

        _controller.RegisterCallbackForPinValueChangedEvent(pin, PinEventTypes.Rising | PinEventTypes.Falling,
            (s, e) =>
            {
                if (e.ChangeType == PinEventTypes.Falling)
                {
                    _controller.Write(outputPin, PinValue.Low);
                }
                else
                {
                    _controller.Write(outputPin, PinValue.High);

                    if (!sw.IsRunning)
                    {
                        sw.Start();
                    }
                    else
                    {
                        var elapsed = sw.Elapsed;
                        sw.Restart();

                        lastUpdate = DateTime.UtcNow;

                        var rotationsPerSecond = 1.0 / elapsed.TotalSeconds;
                        double speed = rotationsPerSecond * 16;

                        _ = _hub.Clients.All.SendAsync("SendSpeed", speed);

                        Console.WriteLine($"Speed: {speed} km/h");
                    }
                }
            });

        _ = Task.Run(async () =>
        {
            while (true)
            {
                await Task.Delay(1000, cancellationToken);

                if ((DateTime.UtcNow - lastUpdate).TotalSeconds > 3)
                {
                    _ = _hub.Clients.All.SendAsync("SendSpeed", 0, cancellationToken);
                    Console.WriteLine($"No update detected, assuming 0");
                }
            }
        }, cancellationToken);

        return Task.CompletedTask;
    }

    public Task StopAsync(CancellationToken cancellationToken)
    {
        _controller.Dispose();
        return Task.CompletedTask;
    }
}

internal class SpeedHub : Hub
{
}

class Program
{
    static void Main(string[] args)
    {
        var host = new WebHostBuilder()
            .UseKestrel()
            .UseUrls("http://*:5000/")
            .UseStartup<Startup>()
            .Build();

        host.Start();

        Console.WriteLine("Started");

        host.WaitForShutdown();
        return;
}
What about the client-side? The goal was to start playing a video when the speed got above a threshold and stop it when it got below. Most video players (including web ones) use the spacebar as a shortcut to pause/resume the video, so all I did was sending the spacebar input to the focused application when the speed got above or below the threshold.
private HubConnection _connection;
private int _threshold = 20;
private bool _isAboveThreshold;

public MainWindow()
{
    InitializeComponent();
}

private async void ButtonConnect_Click(object sender, RoutedEventArgs e)
{
    var ip = TextIp.Text;

    _connection = new HubConnectionBuilder()
        .WithAutomaticReconnect()
        .WithUrl($"http://{ip}:5000/speed")
        .Build();

    try
    {
        await _connection.StartAsync();
    }
    catch (Exception ex)
    {
        MessageBox.Show("Connection failed: " + ex);
        await _connection.DisposeAsync();
        return;
    }

    _connection.On<double>("SendSpeed", speed => { _ = UpdateSpeed(speed); });
}

private async UiOperation UpdateSpeed(double speed)
{
    LabelSpeed.Text = Math.Round(speed, 0, MidpointRounding.AwayFromZero).ToString();

    if (speed >= _threshold && !_isAboveThreshold)
    {
        _isAboveThreshold = true;
        SendKeys.SendWait(" ");
    }
    else if (speed < _threshold && _isAboveThreshold)
    {
        _isAboveThreshold = false;
        SendKeys.SendWait(" ");
    }
}
I also used LiveCharts.Wpf to display the speed on a nice chart.
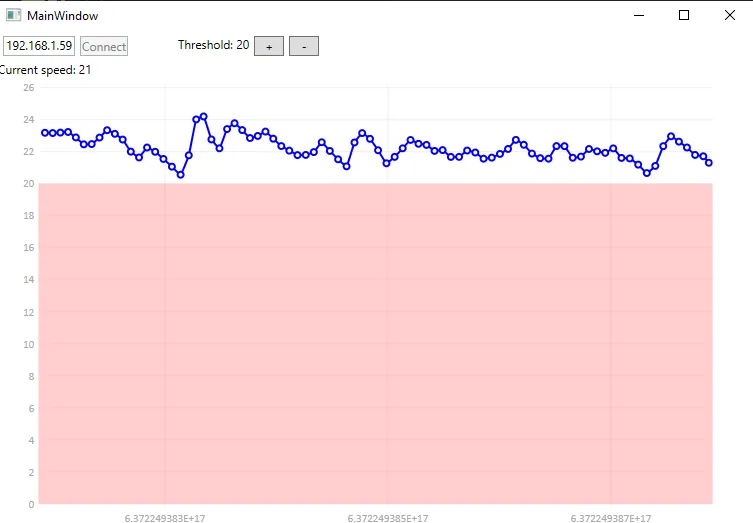 It's ugly but you're supposed to watch the video anyway
For the finishing touches, I attached the Raspberry to the bike and configured it to launch the application at startup. The Raspberry takes a few seconds to start when powered on, so I looked for a way to get visual feedback when the application is loaded and ready to send the speed. The only way I could think of was to use the on-board LEDs, and fortunately, it turns out that they can be controlled programmatically. To turn on the green LED, just write 1 to the /sys/class/leds/led0/brightness file. To turn it off, write 0. To restore the default behavior (have the LED blink on disk access), write mmc0 to /sys/class/leds/led0/trigger.
private void Blink()
{
    while (!_isClientConnected)
    {
        File.WriteAllText("/sys/class/leds/led0/brightness", "0");
        Thread.Sleep(500);
        File.WriteAllText("/sys/class/leds/led0/brightness", "1");
        Thread.Sleep(500);
    }

    File.WriteAllText("/sys/class/leds/led0/brightness", "0");
    File.WriteAllText("/sys/class/leds/led0/trigger", "mmc0");
}
With that, my setup was complete, and I could go back to finding excuses not to use the bike.
Current status pic.twitter.com/Hhw1f0vlKq
— Kevin Gosse (@KooKiz) April 5, 2020